
Electric Fan Quilt Block Pattern

To keep these classes free please leave a donation for the teacher here. https://customclothingboutique.com/products/donat-to-motley-muse

Click here for a beginner in depth sewing class on all the basics. https://customclothingboutique.com/pages/quilting-knowledge
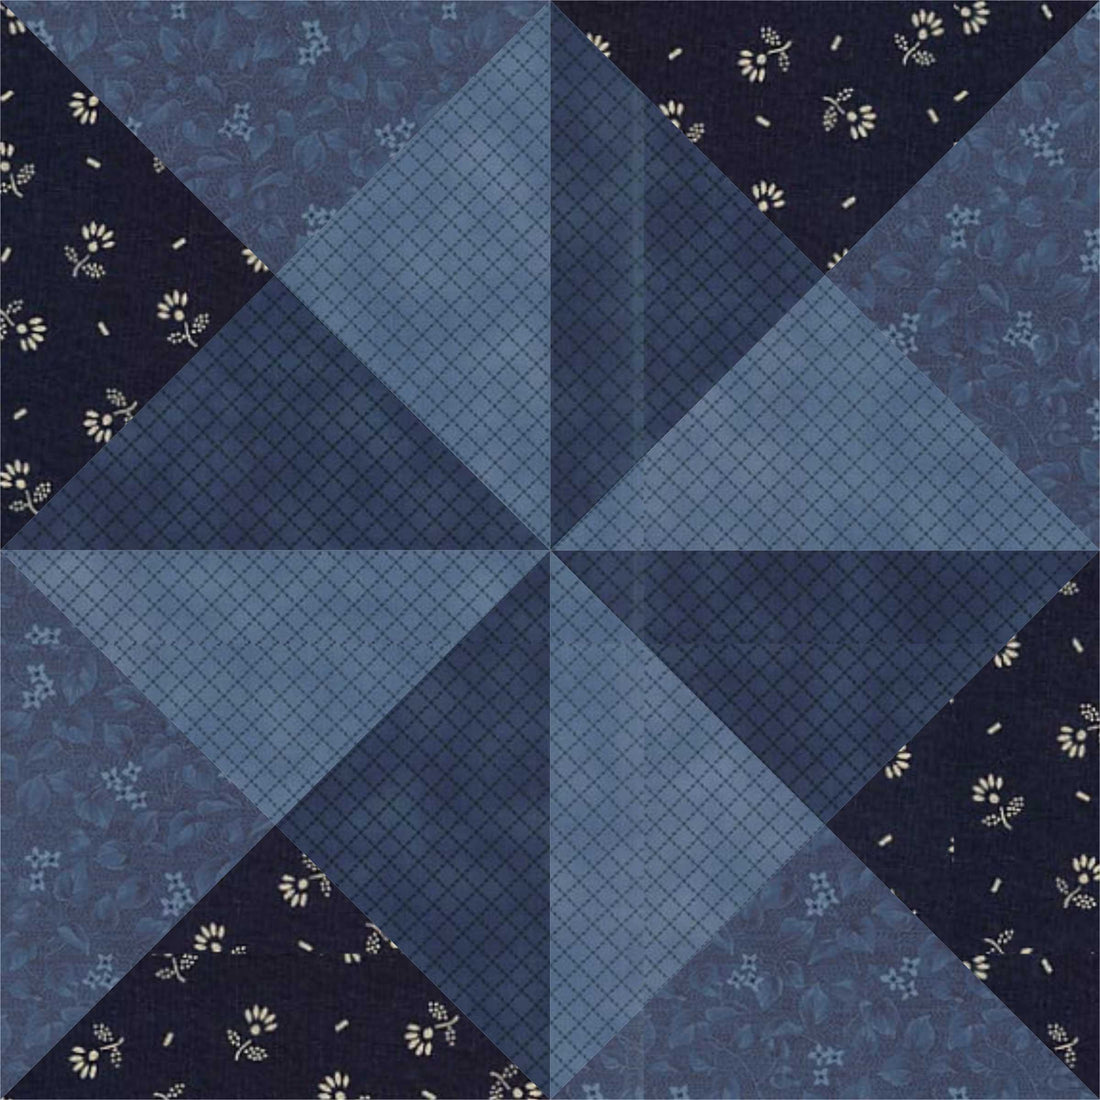
The Big Dipper quilt block pattern is a classic design that adds visual interest and movement to your quilting projects. This tutorial will guide you step-by-step in creating the Big Dipper quilt block. So, gather your fabric, sewing supplies, and let's get started!
Supplies:
Fabric: Choose three contrasting fabrics for the background, star points, and center of the Big Dipper block.
Rotary cutter or fabric scissors
Cutting mat
Quilter's ruler
Sewing machine
Thread
Iron
Ironing board
Pins
Seam ripper (optional)
Step 1: Fabric Preparation
Start by washing, drying, and ironing your fabric to ensure it's clean and free from any wrinkles. This step is crucial for accurate cutting and sewing.
Step 2: Determine Measurements
Decide on the desired finished size of your Big Dipper quilt block. For this tutorial, we'll use 12 inches square as an example. Take note that the measurements can be adjusted to fit your specific needs.
Step 3: Cutting the Fabric
To create the Big Dipper block, you'll need the following fabric pieces:
Background fabric: Cut two 4.5-inch squares and two 3.5 x 9.5-inch rectangles.
Star points fabric: Cut four 3.5-inch squares.
Center fabric: Cut one 3.5-inch square.
Use your rotary cutter or fabric scissors, cutting mat, and quilter's ruler to make precise cuts. Take care to maintain accurate measurements.
Step 4: Constructing the Star Points
Take your four 3.5-inch squares of star points fabric. Place one square on top of each background fabric rectangle. Align the edges and pin them in place.
Using a ¼ inch seam allowance, sew diagonally across each square, from corner to corner. Repeat this for all four squares.
Trim the excess fabric, leaving a ¼ inch seam allowance. Press the seams open or toward the darker fabric.
Step 5: Assembling the Block
Lay out the pieces for the Big Dipper quilt block as follows:
Place the star points units on opposite corners of the 4.5-inch background squares.
Align the 3.5 x 9.5-inch background rectangles on the remaining sides of the star points units.
Position the center fabric square in the center of the block.
Double-check the layout to ensure everything is in the correct position before sewing.
Step 6: Sewing the Rows
Start by sewing the top and bottom rows. With right sides together, align the pieces and pin them in place. Sew a ¼ inch seam along each row.
Press the seams open or toward the darker fabric.
Step 7: Completing the Block
Once the rows are sewn, join the top and bottom rows together, aligning the seams carefully. Pin the pieces together to keep them aligned during sewing.
Stitch the rows together using a ¼ inch seam allowance. Press the seams open or toward the darker fabric.
Step 8: Finishing Touches
Trim any excess threads and press the entire block, ensuring all seams are flat and the block lies flat.
Congratulations! You have successfully created a Big Dipper quilt block!
Step 9: Incorporating the Block
To incorporate the Big Dipper block into a larger quilt, repeat the steps to create additional blocks. Experiment with different fabric combinations and orientations to achieve varied visual effects. Once you have enough blocks, sew them together, adding sashing or borders as desired, to create a stunning quilt top.

How to Resize Quilt Blocks:
The first step in modifying any quilt block is to decide on the size of your finished quilt block. You can come to a decision based on a number of factors: doubling a pattern, cutting your pattern in half, or choosing the size based on your available fabric.
NOTE: When working from a pattern’s cutting instructions, make sure you remove the seam allowance before doubling or tripling the size. For instance, if your pattern calls for 3-1/2″ squares, first you’ll subtract the sum of the seam allowances (1/2″), double the finished block size (from 3″ to 6″), and add the seam allowance back in (1/2″). So, when all is said and done, you will cut a 6-1/2″ piece of fabric.
Resizing Square Blocks:
Square blocks are the easiest to resize. Simply add to your finished block measurement. For example, if you’d like your finished block to be a 4″ square, you’ll need to cut a 4-1/2″ square of fabric.
Resizing Rectangular Blocks:
Similarly to the square, for rectangle blocks, you’ll add to the length and width measurements of your finished block. If you’re doubling block that measures 3″ x 4″ in your quilt, you’ll cut a 6-1/2″ x 8-1/2″ rectangle of fabric.
Resizing Half-Square Triangle Blocks:
When you want to change the size of a Half-Square Triangle block, add 7/8″ to the desired finished block size. To make a 4″ finished block, you’d cut 4-7/8″ squares.
Resizing Quarter Square Triangle:
Since there are two cut lines and two seam lines in a Quarter-Square Triangle block you’ll need to add 1-1/4″ to the desired finished block size. For a finished block that’s 4″, you’d cut your squares 5-1/4″.