


New to quilting? Click here for a beginner in-depth sewing class covering all the basics.
How to Sew a Sailboat Quilt Block
The Sailboat quilt block is a charming nautical design built from half-square triangles. It’s a wonderful block for showcasing contrasting fabrics and creating a playful, graphic quilt.
Materials:
- Fabric in 3 colors: sky (background), sail, and water/hull
- Rotary cutter, cutting mat & ruler
- Sewing machine & thread
- Iron and ironing board
Instructions:
- Cut your fabric pieces according to your chosen block size. You’ll need squares for the half-square triangle units (sail and sky), and rectangles or squares for the hull and water sections.
- Make your half-square triangle units: pair sail fabric with sky fabric, right sides together. Draw a diagonal line on the wrong side of the lighter square, sew ¼" on each side of the line, then cut along the line. Press seams toward the darker fabric and trim to size.
- Arrange all pieces following the sailboat layout — HST units and sky squares at the top forming the sail, hull and water pieces at the bottom.
- Sew the pieces into rows using a ¼" seam allowance, pressing seams in alternating directions on each row.
- Sew the rows together, matching seams carefully. Press the final seams.
- Trim the block to your desired finished size, keeping all corners square.
- Repeat to create as many Sailboat blocks as needed for your quilt.
Making Half-Square Triangles
This technique eliminates the need to directly manipulate the stretchy bias of the triangle. It uses two easy-to-cut squares to produce two half-square triangles.
On the back of the lighter fabric, draw a pencil line diagonally from corner to corner.

Stack a pair of light and dark squares right sides together. Sew a ¼" seam allowance on each side of the line.

You will end up with something like this:

Now cut along the diagonal line.

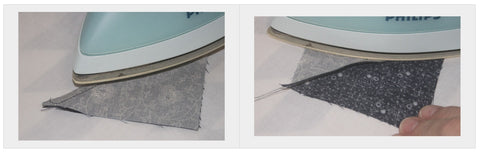
Press the seam to set it, then press toward the darkest fabric.
To trim to the exact size, line up the 45° diagonal on your ruler with the seam.

Then carefully trim your block with a rotary cutter.

How to Resize Quilt Blocks
The first step in modifying any quilt block is to decide on the finished size. You can base this on doubling a pattern, cutting it in half, or working with your available fabric.
Important: Always remove the seam allowance before doubling or tripling the size. For example, if your pattern calls for 3½" squares, subtract the seam allowances (½"), double the finished block size (3" → 6"), then add the seam allowance back (½"). You’ll end up cutting a 6½" piece of fabric.
Resizing Square Blocks
Add ½" to your desired finished block measurement. For a 4" finished square, cut a 4½" square of fabric.
Resizing Rectangular Blocks
Add ½" to both the length and width. To double a block that measures 3" × 4", cut a 6½" × 8½" rectangle of fabric.
Resizing Half-Square Triangle Blocks
Add ⅞" to the desired finished block size. For a 4" finished block, cut 4⅞" squares.
Resizing Quarter-Square Triangle Blocks
Add 1¼" to the desired finished block size. For a 4" finished block, cut your squares 5¼".
0 comments