


New to quilting? Click here for a beginner in-depth sewing class covering all the basics.
How to Sew an Ohio Star Quilt Block
The Ohio Star quilt block is a classic design featuring a large central star surrounded by smaller squares. Here's what you'll need and how to make it.
Materials needed:
- Fabric for the star (1 color or print)
- Fabric for the background (1 color or print)
- Sewing machine & thread
- Scissors & ruler
- Iron and ironing board
Instructions:
- Cut the star fabric into 1 large square and 4 smaller squares. The large square should be your desired finished size plus ⅞" for seam allowances. The smaller squares should be the same size as each other and ⅞" smaller than the large square.
- Cut the background fabric into 4 squares the same size as the smaller star squares.
- With right sides together, sew the smaller squares to the corners of the large square using a ¼" seam allowance. Press seams toward the star fabric.
- Sew two background squares together using a ¼" seam allowance. Repeat with the remaining two background squares.
- Sew the two background units to the sides of the star unit using a ¼" seam allowance. Press seams toward the background fabric.
- Sew the remaining background units to the top and bottom of the star unit. Press seams toward the background fabric.
- Trim the block to your desired finished size, keeping corners and edges square.
- Repeat to create as many Ohio Star blocks as needed for your project.
Once you have several blocks, arrange them in different ways to create unique quilt designs. Have fun experimenting with colors, fabrics, and layouts!
Making Half-Square Triangles
On the back of the lighter fabric, draw a pencil line diagonally from corner to corner.

Stack a pair of light and dark squares right sides together. Sew a ¼" seam allowance on each side of the line.

You will end up with something like this:

Now cut along the diagonal line.

Press the seam to set it, then press toward the darkest fabric.
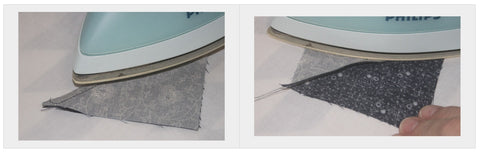
To trim the block to the exact size, line up the 45° diagonal on your ruler with the seam.

Then carefully trim your block with a rotary cutter.

Making Quarter-Square Triangles
On the back of the lightest square, draw a pencil line 90° to the existing seam on the diagonal:

Butt the central seams:

Sew a ¼" seam allowance on the right and left side of the diagonal line.

Then cut along the pencil line.

Nine Patch Piecing
The secret to the nine patch is all about pressing seams so they butt when joined. Cut 5 A squares and 4 B squares in the required size.
Using chain piecing, join a B square to 3 of the A squares, right sides together, with a ¼" seam allowance. The result will be:

Next, chain piece the remaining A and B squares to these units:

Your result will be:

To make this faster, cut A and B strips at the appropriate width and join them into A/B/A and B/A/B units. Press every seam toward the dark fabric. Then cut across the pre-joined strips to create the units needed:

You'll achieve the same result, but faster:

Press all seams toward the dark fabric so they butt up. Join the B/A/B units to your A/B/A units with butted seams, right sides together, with a ¼" seam allowance.
This methodology applies to all kinds of 9-patch blocks — as long as the block has an underlying 3×3 grid, the basic principle applies. As long as you keep pressing seams in pairs of opposite directions, piecing will be smooth sailing.

When it's not obvious which direction is the dark in complicated blocks, remember the basic ironing plan:

How to Resize Quilt Blocks
The first step in modifying any quilt block is to decide on the finished size. You can base this on doubling a pattern, cutting it in half, or working with your available fabric.
Important: When working from a pattern's cutting instructions, always remove the seam allowance before doubling or tripling the size. For example, if your pattern calls for 3½" squares, subtract the seam allowances (½"), double the finished block size (3" → 6"), then add the seam allowance back (½"). You'll end up cutting a 6½" piece of fabric.
Resizing Square Blocks
Add ½" to your desired finished block measurement. For a 4" finished square, cut a 4½" square of fabric.
Resizing Rectangular Blocks
Add ½" to both the length and width. To double a block that measures 3" × 4", cut a 6½" × 8½" rectangle of fabric.
Resizing Half-Square Triangle Blocks
Add ⅞" to the desired finished block size. For a 4" finished block, cut 4⅞" squares.
Resizing Quarter-Square Triangle Blocks
Add 1¼" to the desired finished block size. For a 4" finished block, cut your squares 5¼".

0 comments