

To keep these classes free please leave a donation for the teacher here. https://customclothingboutique.com/products/donat-to-motley-muse

To sew a flower basket quilt block, you will need the following materials:
- Fabric in different colors for the basket, flowers, and leaves
- Quilting ruler
- Rotary cutter
- Sewing machine
- Iron and ironing board
- Thread
Here are the steps to make a flower basket quilt block:
- Cut the fabric into the following pieces:
- Basket fabric: 5" x 5" square
- Flower fabric: 4" x 4" square
- Leaf fabric: two 3" x 4" rectangles
-
Cut the basket fabric diagonally to create two triangles.
-
Sew the two basket triangles together along the long edge with a 1/4" seam allowance. Press the seam open.
-
Place the flower fabric right side up on top of the basket fabric, aligning the bottom edges. Sew along the bottom edge with a 1/4" seam allowance. Press the seam open.
-
Cut the leaf rectangles diagonally to create four triangles.
-
Sew the leaf triangles to the sides of the basket, aligning the long edges. Press the seams open.
-
Trim the block to 8" x 8".
-
Repeat the above steps to create as many flower basket quilt blocks as needed.
-
Once you have made all the blocks, sew them together to create a quilt top.
-
Layer the quilt top with batting and backing fabric and quilt as desired.
-
Bind the edges of the quilt with fabric strips to finish the project.
That's it! You now have a beautiful flower basket quilt block.
This is a great technique for making half square triangles that eliminates the need to directly manipulate the stretchy bias of the triangle. It utilizes two easy to cut squares producing two half square triangles.
On the back of the lighter fabric, draw a pencil line, diagonally from corner to corner.

Stack a pair of light and dark squares, right sides together. Sew a 1/4 inch seam allowance on each side of the line.

You will end up with something like this.

Now cut along the diagonal line.

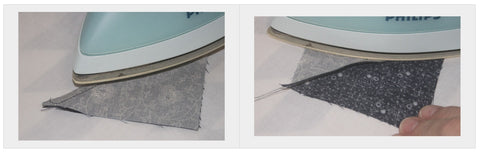
Press the seam together to set the seam. Then press towards the darkest fabric.
To trim the block to the exact size line up the diagonal 45°angle with the ruler on your seam.

And then carefully trim your block with a rotary cutter.

Sew the squares together.

Mark the wrong side of the unit with a pencil line aligning the corners of the squares and the intersection of the seams.

Line up the corner of the square or triangle you will add to the corner of the unit:

Sew a seam one thread's width from the marked / ironed line. This tiny allowance makes room for the fold of the fabric so that the point isn't cut off the triangle.
Then fold the triangle into position, using the squares to assist alignment then press.

Trim away excess fabric to reduce bulk. Leaving a 1/4" seam, and trim the ears.

Комментариев: 0