

To keep these classes free please leave a donation for the teacher here. https://customclothingboutique.com/products/donat-to-motley-muse

The whirlwind quilt block is a popular block pattern that creates a beautiful swirling effect in the quilt design. Here's how you can sew a whirlwind quilt block:
Materials needed:
- Fabric in two or more colors
- Sewing machine
- Thread
- Rotary cutter
- Cutting mat
- Ruler
- Iron
Instructions:
-
Choose two contrasting fabrics for the whirlwind quilt block.
-
Cut two squares of fabric in each color. The size of the squares will depend on the size of the block you want to make. For example, if you want a 12-inch block, cut four 6-inch squares.
-
Place the two squares of fabric right sides together, one of each color. Pin the squares together if desired.
-
Sew a 1/4-inch seam around all four sides of the squares.
-
Cut the sewn squares in half diagonally, from corner to corner, to create four triangles.
-
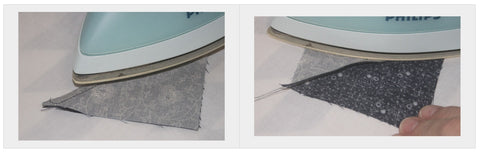
Press the seams open.
-
Take two of the triangles, one from each color, and place them right sides together, matching the seams. Pin the triangles together.
-
Sew a 1/4-inch seam along the long edge of the triangles, starting at the tip of the triangle and ending at the opposite end.
-
Repeat steps 7 and 8 with the remaining two triangles.
-
Press the seams open.
-
Place the two triangle pairs right sides together, with the opposite colors touching each other. Pin the triangles together.
-
Sew a 1/4-inch seam along the long edge of the triangles, starting at the tip of the triangle and ending at the opposite end.
-
Press the seams open.
-
Trim the block to the desired size, making sure to square it up.
-
Repeat these steps to create as many whirlwind blocks as you need for your quilt.
By following these steps, you can create a beautiful whirlwind quilt block that can be used in a variety of quilt designs.
This is a great technique for making half square triangles that eliminates the need to directly manipulate the stretchy bias of the triangle. It utilizes two easy to cut squares producing two half square triangles.
On the back of the lighter fabric, draw a pencil line, diagonally from corner to corner.

Stack a pair of light and dark squares, right sides together. Sew a 1/4 inch seam allowance on each side of the line.

You will end up with something like this.

Now cut along the diagonal line.

Press the seam together to set the seam. Then press towards the darkest fabric.
To trim the block to the exact size line up the diagonal 45°angle with the ruler on your seam.

And then carefully trim your block with a rotary cutter.


Комментариев: 0